Some links on this page are Amazon affiliate links. If you choose to buy through them, RemoteWorkHaven may earn a small commission at no extra cost to you.
These links only appear where tools or setup gear naturally fit the topic. No paid placements. No brand endorsements.
Nobody told you that your lighting setup was going to matter this much. You bought a decent webcam, got a microphone, set up your desk, and figured that was enough. Then someone on a call told you that you look washed out. Or you started getting headaches by early afternoon for no reason you could identify. Or you noticed that every video call you’re on, you’re the one who looks like they’re broadcasting from a parking garage while everyone else looks like they have a production team.
That’s a lighting problem. And it’s the most overlooked part of a remote work setup.
Why Nobody Fixes This First
Lighting doesn’t feel like a productivity problem, so people don’t treat it like one. You think about your chair, your desk, your monitor, your internet connection. Lighting sounds like a vanity concern, something for streamers and YouTubers, not for someone doing actual work.
But bad lighting costs you in two completely separate ways, and neither of them is about looking good for its own sake. The first is professional appearance on video calls, which matters more than most people want to admit in a remote environment where your face on a screen is often the only impression you make. The second is eye strain and cognitive fatigue from working in poorly designed ambient light for eight or more hours a day, which is a direct productivity and health issue. These are different problems with partially overlapping solutions, and if you don’t understand the difference you’ll keep buying the wrong things.
Most remote workers fix neither because they don’t realize either is a problem until it’s already costing them. If you’ve been staring at a screen in a dim room all winter and wondering why your eyes are wrecked by 3pm, now you know. Remote work screen fatigue is real and lighting is one of the primary drivers most people never address.
The Two Problems Bad Lighting Creates
Problem one: you look unprofessional on camera. This is not about aesthetics. In a remote environment, your video presence is your physical presence. Managers, clients, and colleagues are making constant unconscious assessments based on how you look on screen, and bad lighting signals a level of setup carelessness that reads as disorganization whether or not that’s fair. The specific problem is usually one of three things: you’re backlit by a window behind you, your only light source is overhead and creates harsh shadows, or you have no dedicated front light and your face is dim and flat. Any of these can make a competent person look unserious on a call.
Problem two: your eyes are working too hard all day. This one is less obvious but more damaging over time. When the ambient light in your room is significantly dimmer or brighter than your monitor, your eyes are constantly adjusting between the two. That constant adjustment is what causes eye strain, headaches, and the specific exhaustion that hits you mid-afternoon even when you haven’t done anything physically demanding. It’s not screen time that’s the problem. It’s the contrast between your screen and your environment.
What the Different Lighting Types Actually Do
Before you buy anything, understand what each type of lighting is solving for. Most people conflate these and end up with something that solves one problem while ignoring the other.
Key light is your primary front-facing light source. This is what illuminates your face on camera. It’s directional, usually positioned slightly to one side and above eye level, and it’s what separates people who look professional on video from people who look like they’re sitting in the dark. A key light doesn’t have to be expensive. It has to be positioned correctly and bright enough to overpower whatever ambient light is behind you.
Bias lighting is the strip of light behind your monitor that matches the color temperature of your screen. It has nothing to do with how you look on camera. Its entire job is reducing the contrast between your bright screen and your dark surrounding environment, which is the primary mechanical cause of eye strain during long work sessions. Most people have never heard of it. It’s also one of the cheapest upgrades you can make and one of the most immediately noticeable in terms of how your eyes feel at the end of the day.
Ambient lighting is the general room light that fills in the background. Too little and you look like you’re working in a cave on camera. Too much from the wrong direction and it creates glare on your screen or washes you out. The goal is enough ambient light to balance your monitor brightness without creating a secondary light source that competes with your key light on camera.
Ring lights are consumer key lights designed for front-facing camera use. They work. They’re affordable and easy to set up. The specific downside is the ring reflection visible in your eyes on close-up shots, which looks fine for most video calls but becomes noticeable in higher-stakes recordings or presentations. Not a dealbreaker. Just worth knowing.
What to Prioritize Based on Your Situation
If you’re on video calls constantly and your appearance on camera is your biggest concern, start with a key light. Position it at roughly 45 degrees to one side of your camera, slightly above eye level, aimed at your face. Get your window out of the frame behind you or cover it during calls if it’s creating backlight. That single change will do more for how you look on camera than any other upgrade.
If eye fatigue and headaches are your main problem and you’re not particularly camera-heavy, start with bias lighting. A basic LED strip behind your monitor set to roughly 6500K daylight color temperature will reduce eye strain significantly within the first week. This is a twenty dollar fix for a problem that has probably been costing you productivity for months.
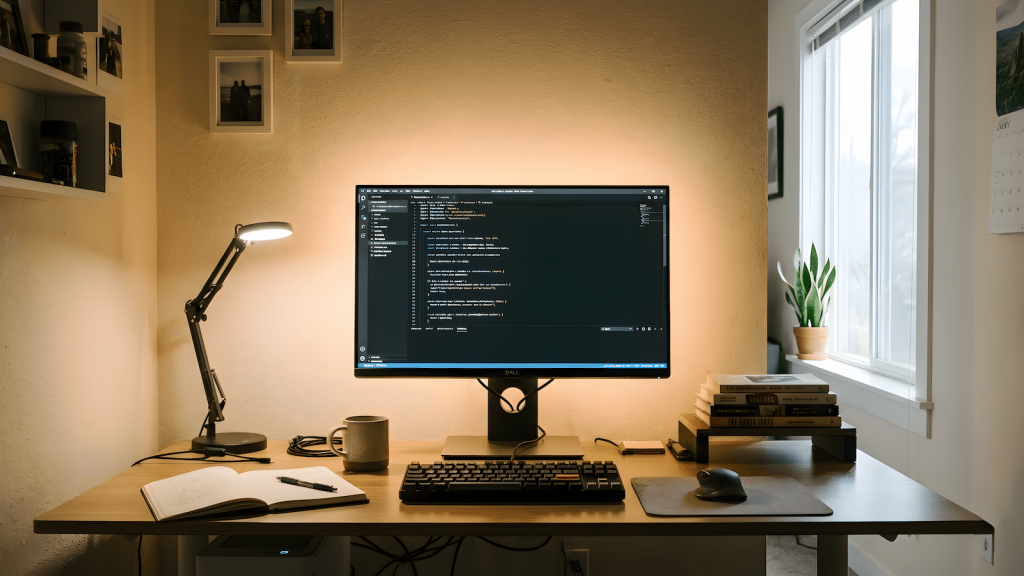
If you’re building a setup from scratch or doing a full upgrade, do both. Key light for camera presence, bias lighting for eye health, and enough ambient light to make the room feel like a functional workspace rather than a server room. Your home office is a control room and lighting is part of the infrastructure, not the decoration.
What Not to Waste Money On First
The most common mistake is buying a ring light as a first purchase without fixing the ambient lighting situation. A ring light in a dark room with a window behind you still looks bad on camera because the backlight is competing with your front light. Fix the direction of your light sources before you add more light.
The second common mistake is buying expensive lighting before solving basic positioning. A cheap key light in the right position beats an expensive one in the wrong position every time. Get the geometry right first, then upgrade the hardware if you need to.
The third mistake is ignoring bias lighting entirely because it doesn’t feel important. If you’re working eight hour days in front of a monitor and your eyes are tired by afternoon, bias lighting is the highest ROI lighting purchase you can make. It costs almost nothing and fixes a problem that’s directly affecting your output. Don’t skip it because it sounds boring. If you want to understand the full picture of what a clean signal setup looks like, this post on desk setup and focus covers the broader environment side of this beyond just lighting.
The Minimum Viable Lighting Setup
If you want to solve both problems without overcomplicating it, this is the floor:
One key light or ring light positioned at 45 degrees to your camera, slightly above eye level. One bias lighting strip behind your monitor set to daylight color temperature. Enough ambient room light to bring the background up so it doesn’t look like a void behind you on camera.
That’s it. Three elements, two of which cost very little. This setup solves the camera appearance problem, solves the eye strain problem, and works whether you’re in a dedicated home office or a corner of your bedroom. Everything beyond this is optimization, not necessity.
The reason most remote workers are still sitting in bad light two years into working from home is not that the solution is complicated. It’s that nobody framed it as a problem worth solving. It is. Your eyes will tell you within a week, and so will the next person who stops to mention that you actually look decent on camera for once.
Related: Mission Critical Remote Work Gear covers the broader hardware side of a functional remote setup if you’re doing a full audit.

WFH Survival Architect • Licensed Procrastination Consultant
Has squinted through enough bad home office lighting to know exactly what it costs you by 3pm. Built RemoteWorkHaven.net for remote workers who are tired of fixing the wrong things first and want a setup that actually holds up under a full workday.
Good content costs something. This one’s on me. Support it if it hit.
📱 Medium • Ctrl+Alt+Survive (FB) • Ctrl+Alt+Survive (YT)
No productivity theater. Just how your brain actually works.